


By Ata Rameka – Acting Coordinator at The Y Revesby South OSHC
SUPPLIES
- Glue
- Scissors
- Paper and or card
- Textas and or colouring pencils etc
OPTIONAL EXTRAS
- Collage craft decorations
- Recycled magazine, paper
DIRECTIONS
Making the pop up base boxes
1. Fold white paper in half; then using a pencil draw 2 lines on the folded edge, with at least 3cm apart (as picture shows)
2. Using scissors, cut vertically following the lines you drew
3. Bend the parts of the paper you just cut out
4. Turn the paper around and push in the boxes to make them stand up. These will become the base boxes for your popup art.
5. Let your creative side come out and decide what kind of card you would like to make. Once you have decided choose what art you want to pop up out of your card and start creating
6. Draw your art or choose a picture to cut out using scissors
7. Place glue on the front part of boxes only
8. Place pictures on to the parts of the box you applied glue on. Now let your creativity flow and design the inside of your card
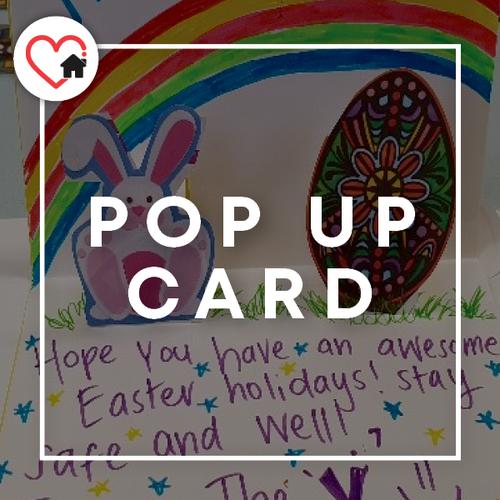
9. Design front of card and you’re done!
DIRECTIONS
Step 1: Fold white paper in half; then using a pencil draw 2 lines on the folded edge, with at least 3 cm apart as picture shows

Step 2: Using scissors, cut vertically following the lines you drew

Step 3: Bend the parts of the paper you just cut out

Step 4: Turn the paper around and push in the boxes to make them stand up. These will become the base boxes for your popup art.

Step 5: Let your creative side come out and decide what kind of card you would like to make. Once you have decided choose what art you want to pop up out of your card and start creating.
Step 6: Draw your art or choose a picture to cut out using scissors (We chose to cut out a picture instead)
Tip: Making sure you only place glue on the front part of the box (marked in blue, see picture)

Step 7: Place glue on the front part of boxes only. (see blue lines)

Step 8: Place pictures on to the parts of the box you applied glue on. Now let your creativity flow and design the inside of your card

Step 9: Design front of card and you’re done.

Done!


